
DIY wedding arch is a handcrafted framework designed to serve as a decorative focal point for a wedding ceremony. It can be customized with various materials, colors, and embellishments to match the couple’s theme and style. Creating your own wedding arch allows for personal touches and can be a budget-friendly alternative to professionally made options.
Transform your wedding day into a magical experience with a DIY wedding arch that reflects your unique style and creativity. Crafting your own arch allows you to infuse personal touches and save on costs while creating a stunning focal point for your ceremony. With a little imagination and effort, your custom arch will become a cherished symbol of your special day.
Creating a DIY wedding arch allows you to infuse your personal style into one of the most memorable elements of your ceremony. With a bit of creativity and some careful planning, you can craft a stunning arch that reflects your unique taste and complements your wedding theme. From choosing the perfect materials to adding personal touches, building your own wedding arch can be both a rewarding and budget-friendly endeavor.
Choosing Your Wedding Arch Design
Choosing your wedding arch design is a pivotal step in setting the tone for your ceremony. Start by considering the overall theme and style of your wedding—whether it’s rustic, elegant, or whimsical—as this will guide your design choices. Think about the backdrop and how the arch will blend with your venue to create a cohesive look.
Next, reflect on the practical aspects, such as the size and shape of the arch to ensure it fits comfortably in your ceremony space. Whether you opt for a classic archway or a more modern geometric design, make sure it complements your dress and the surrounding décor. This thoughtful planning will help you create a memorable focal point for your vows.
Materials Needed for Your DIY Wedding Arch
When planning your DIY wedding arch, selecting the right materials is essential for both stability and aesthetics. Common materials include sturdy wooden or metal frames for the structure, floral foam or fabric for decoration, and fasteners like screws or zip ties to secure components. You might also need tools such as a drill or saw, depending on your design.
In addition to the framework, consider decorative elements like artificial or fresh flowers, draping fabric, or string lights to enhance the arch’s appearance. Ensure you have all necessary supplies on hand to avoid last-minute trips and to streamline your building process.
Step-by-Step Guide to Assembling Your Wedding Arch
Measure and Cut Materials:
Start by measuring and cutting your chosen materials to fit your desired arch dimensions. If using wood, cut the pieces to form the base and sides. For metal frames, ensure all parts are appropriately sized and shaped according to your design.
Assemble the Frame:
Begin assembling the frame by attaching the pieces together using screws, bolts, or connectors. Make sure the structure is stable and securely fastened. If using a pre-made frame, follow the manufacturer’s instructions for assembly.
Decorate and Finalize:
Once the frame is assembled, add your chosen decorations such as fabric drapes, flowers, or lights. Secure these elements with floral wire, hot glue, or other adhesives. Finally, double-check the stability of the arch and make any necessary adjustments before your wedding day.
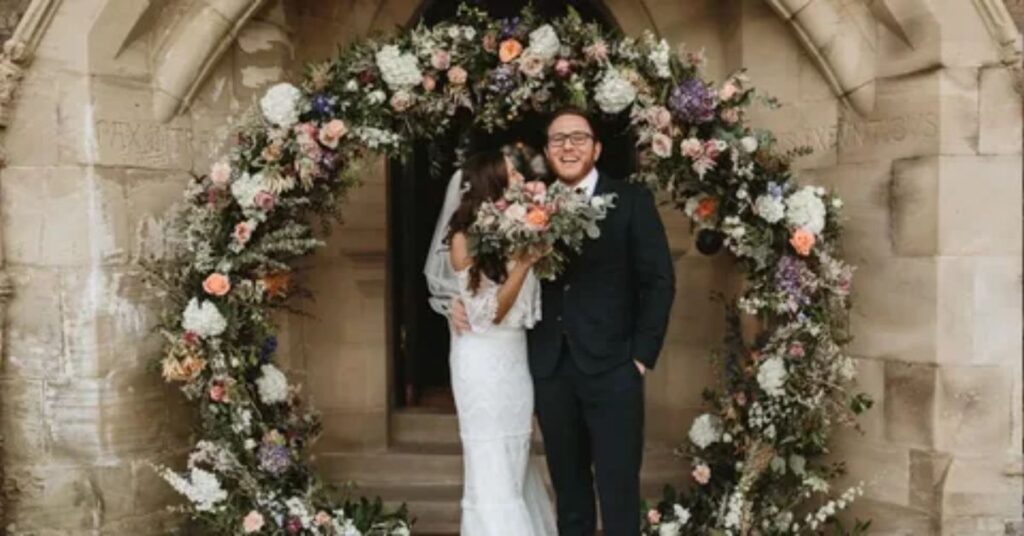
Decorating Your Wedding Arch: Ideas and Tips
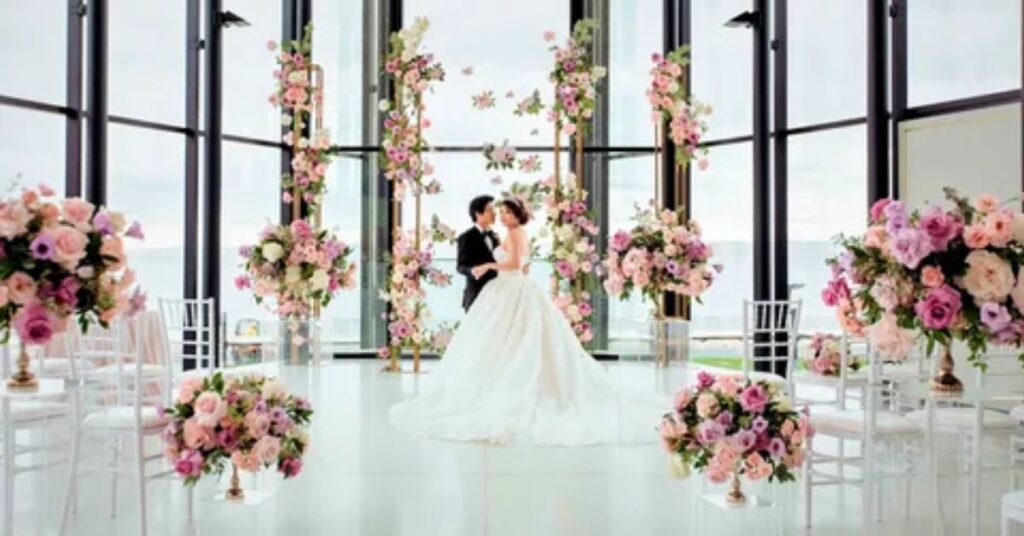
Decorating your wedding arch is a chance to showcase your personal style and complement your wedding theme. Start with a base of fabric drapes or tulle for a soft, elegant look. Choose colors and textures that match your overall décor, and consider adding fairy lights for a romantic glow.
Floral arrangements are a popular choice for arch decoration. Opt for fresh or artificial blooms in your wedding colors, and arrange them in clusters or along the sides of the arch. Incorporating greenery or seasonal elements can add depth and texture. For a unique touch, consider adding hanging elements like lanterns, ribbons, or even personalized signs.
Read this blog; Romantic Wedding Makeup
Safety Tips for Building Your DIY Wedding Arch
When building your DIY wedding arch, safety should be a top priority. First, ensure that all tools and equipment are used correctly and stored safely. Wear protective gear like gloves and goggles when cutting or assembling materials to prevent injuries.
Secure the arch properly by anchoring it firmly to the ground or using weighted bases to prevent tipping, especially if it’s an outdoor setup. Check the stability of the structure regularly during assembly and before the wedding to ensure it can support decorations and withstand weather conditions. Lastly, have a backup plan in case of unforeseen issues on the wedding day.
How to Secure Your Wedding Arch for the Big Day

To secure your wedding arch for the big day, begin by ensuring it’s anchored properly to prevent any movement. For outdoor events, use ground stakes or weights to keep the arch stable. If the ground is soft, such as grass or soil, drive stakes deep into the ground; for harder surfaces, consider using weighted bases or sandbags.
Check the arch’s stability once it’s in place and make any necessary adjustments. Secure the arch to any nearby structures if possible, and ensure all decorative elements are firmly attached. Finally, monitor the arch throughout the day, especially if weather conditions change, to ensure it remains stable and safe for your ceremony.
Creative Additions: Flowers, Drapes, and More
Adding creative elements to your wedding arch can transform it into a stunning focal point. Start with a floral arrangement that complements your wedding colors and theme. Use a mix of fresh or artificial flowers, greenery, and trailing vines to create a lush, romantic look. Consider incorporating floral garlands or cascading blooms for added drama.
Drapes and fabrics can enhance the arch’s elegance and texture. Choose flowing materials like chiffon or satin in your wedding colors, and let them cascade or wrap around the frame. For a unique touch, add fairy lights, lanterns, or even hanging crystals to create a magical ambiance. You might also include personal touches like custom signage, photos, or meaningful trinkets to make the arch uniquely yours.
Read this blog; Wedding rehearsal
Budget-Friendly Options for Your Wedding Arch
Creating a beautiful wedding arch on a budget is entirely possible with a few creative strategies. Start by using affordable materials like PVC pipe or wooden dowels for the frame, which can be found at most hardware stores. You can often repurpose or borrow items like fabric or lights from friends and family.
For decorations, opt for DIY floral arrangements using silk flowers, which are both cost-effective and reusable. You can also create your own garlands or drapes using inexpensive fabric from craft stores. Adding elements like paper lanterns or handmade decorations can further enhance the arch without breaking the bank. Lastly, look for sales or discounts on wedding supplies to stretch your budget further.
Incorporating Personal Touches into Your Wedding Arch

Incorporating personal touches into your wedding arch adds a unique and memorable element to your ceremony. Start by adding elements that reflect your relationship, such as custom signs with your names or wedding date. You could also include personal mementos like family heirlooms or items that hold special meaning to you both.
Consider using photos or meaningful symbols in your decorations. For example, you might hang framed pictures of loved ones or include handcrafted decorations that represent shared interests or experiences. Personalizing your arch in these ways not only enhances its significance but also makes it a true reflection of your love story.
Maintaining and Storing Your Wedding Arch After the Wedding
After your wedding, maintaining and storing your arch properly ensures it remains in good condition for future use or keepsakes. First, carefully dismantle the arch and clean any decorations or components. Remove any debris, and check for any damage or wear that might need repairing.
Store the frame in a dry, cool place to prevent warping or rusting. For wooden arches, consider using a protective cover to guard against moisture. Keep decorative elements, like flowers or fabric, in sealed containers to avoid dust and damage. If you plan to reuse or repurpose the arch, document any assembly instructions or design notes for future reference.
Conclusion
Creating a DIY wedding arch allows you to add a deeply personal touch to your ceremony, reflecting your unique style and creativity. From choosing the design and materials to decorating and securing it, each step offers an opportunity to make the arch truly your own. The effort put into crafting your own arch not only enhances the beauty of your wedding day but also creates lasting memories.
After the big day, maintaining and storing your DIY arch properly ensures it remains a cherished part of your wedding memories. With careful disassembly and proper storage, you can preserve the arch for future use or as a keepsake. Your DIY wedding arch will stand as a testament to your creativity and dedication, making your special day even more memorable.
Frequently Asked Questions
What can I use instead of a wedding arch?
Instead of a wedding arch, consider using a beautifully decorated backdrop, a floral installation, or an elegant draped frame.
How to make a homemade arch?
To make a homemade arch, build a frame from materials like PVC pipes or wooden dowels, assemble it securely, and decorate with fabric, flowers, or lights.
How to decorate a wedding arch simple?
To decorate a wedding arch simply, use flowing fabric or tulle drapes and add a few clusters of fresh or artificial flowers. Enhance the look with a few fairy lights or greenery for a soft, elegant touch.
What size should a wedding arch be?
A wedding arch should typically be about 7 to 8 feet tall and 6 to 8 feet wide to frame the couple comfortably and accommodate the ceremony space. Adjust the size based on your venue and design preferences to ensure it complements the setting and allows for unobstructed views.